
No products in the cart.


How to Build Your First Gaming PC: A Step-by-Step Guide Leave a comment
Building your first gaming PC starts with setting a clear budget and performance goal. Choose quality components — a powerful CPU, dedicated GPU, compatible motherboard, sufficient RAM, fast SSD storage, reliable PSU, and a case with good airflow. Prepare a static-free workspace and carefully assemble each part, from installing the CPU and cooler to managing cables and powering on for the first time. Once built, install Windows, update drivers, optimize performance settings, and troubleshoot common issues like overheating or boot errors.
While building your own PC is rewarding, it can also be time-consuming and tricky for beginners. That’s where Qbit’s custom PC building services come in — offering professionally assembled, tested, and optimized gaming PCs in Pakistan, tailored to your budget and performance needs for the best gaming experience.
1. Plan Your Build and Set a Budget
Before diving into components, determine your budget and performance goals. Ask yourself:
- What games do I plan to play?
- At what resolution (1080p, 1440p, 4K) and refresh rate?
- Do I plan to stream, edit videos, or just game?
A budget-friendly build might start around Rs. 150,000–200,000 for 1080p gaming, while a high-end build for 4K gaming can go beyond Rs. 500,000. Having a clear budget helps balance spending across parts like CPU, GPU, and storage.
2. Choose the Right Components
Your PC’s performance depends on the components you select. Here’s what to look for:
Processor (CPU)
The CPU handles all the calculations and game logic.
- Intel Core i5/i7 or AMD Ryzen 5/7 are great mid to high-end options.
- For entry-level gaming, Ryzen 5 5600 or Intel i5-12400F are excellent.
- For high-end performance, look at Ryzen 7 7800X3D or Intel i7-14700K.
Graphics Card (GPU)
The GPU determines your frame rates and visual quality.
- For 1080p gaming: RTX 4060 or RX 7600.
- For 1440p: RTX 4070 or RX 7800 XT.
- For 4K gaming: RTX 4080 or RX 7900 XTX.
Motherboard
Choose a motherboard that matches your CPU socket and desired features:
- Intel LGA1700 for 12th–14th Gen CPUs.
- AMD AM5 for Ryzen 7000 series.
Consider features like PCIe 5.0, M.2 slots, and DDR5 support.
Memory (RAM)
- 16GB (2x8GB) DDR4 or DDR5 is the minimum for gaming.
- 32GB is ideal for streaming or multitasking.
Higher frequency RAM improves performance, especially on AMD systems.
Storage
Combine speed and capacity:
- SSD (NVMe) for Windows and frequently played games.
- HDD for mass storage of large files and backups.
A 1TB SSD is the sweet spot for most gamers today.
Power Supply (PSU)
A reliable PSU ensures stability and longevity:
- Look for 80+ Bronze or Gold certification.
- Wattage depends on your GPU — 650W to 850W is standard for most builds.
Stick with trusted brands like Cooler Master, Corsair, or DeepCool.
Case
Pick a case that fits your motherboard (ATX, Micro-ATX, Mini-ITX) and has good airflow.
Make sure it supports your GPU length and cooling setup.
Cooling System
Proper cooling prevents throttling:
- Air coolers are affordable and reliable.
- Liquid AIO coolers offer better aesthetics and temperature control for high-end CPUs.
Always ensure good airflow through intake and exhaust fans.
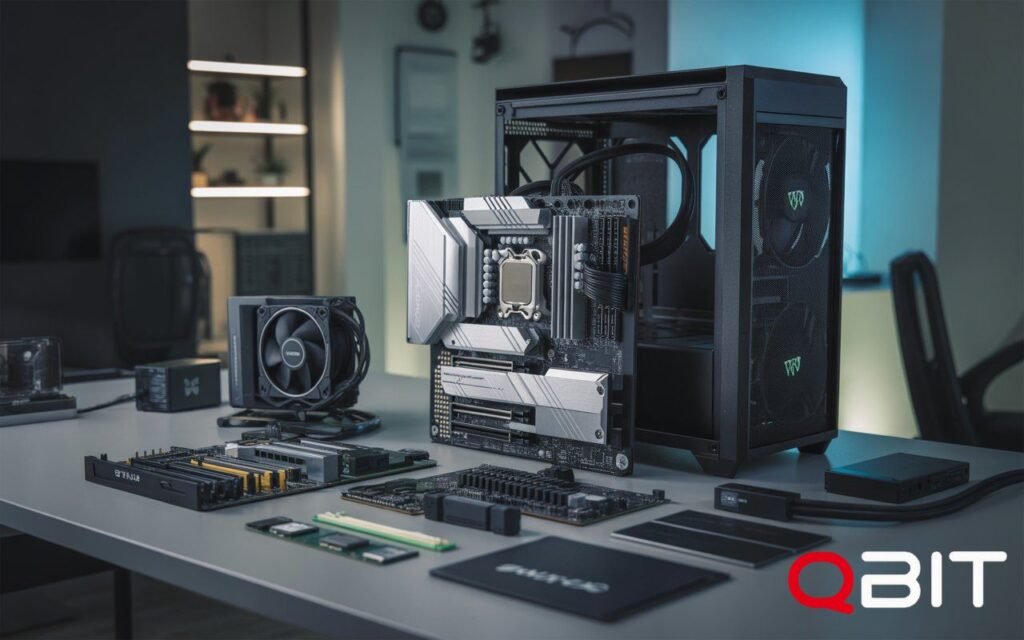
3. Tools and Workspace Preparation
Before assembling, set up a clean, static-free workspace.
You’ll need:
- A Phillips-head screwdriver
- Anti-static wrist strap (optional but recommended)
- Cable ties for management
- A soft surface or anti-static mat
Keep your components organized and handle them carefully to avoid static damage.
4. Step-by-Step Assembly Process
Here’s the fun part — building your PC!
Step 1: Prepare the Case
Open the side panels, remove any pre-installed cables, and check the standoff screws for your motherboard size.
Step 2: Install the CPU
- Open the CPU socket lever.
- Align the golden triangle on the CPU with the socket indicator.
- Gently place the CPU and lock it in place.
Handle it only by the edges — no pressure is needed.
Step 3: Apply Thermal Paste and Install CPU Cooler
Most coolers come with pre-applied thermal paste. If not, apply a pea-sized amount in the center of the CPU.
Mount the cooler securely according to the manual.
Step 4: Install RAM
Align the notches and firmly press the RAM sticks into the motherboard slots until they click.
Use alternating slots for dual-channel mode.
Step 5: Install the Motherboard
Place the I/O shield (if separate) into the case first, then carefully lower the motherboard onto the standoffs.
Secure it with screws but don’t overtighten.
Step 6: Install Storage
Mount M.2 SSDs directly on the motherboard, and connect SATA SSDs/HDDs using the included cables.
Secure them firmly and connect power from the PSU.
Step 7: Install the Power Supply
Place the PSU into the bottom or rear compartment of the case.
Route the necessary cables (24-pin, CPU, GPU, SATA) through the cable management holes for a clean look.
Step 8: Install the GPU
Locate the top PCIe x16 slot and remove the case’s rear expansion covers.
Gently insert the GPU until it clicks and secure it with screws.
Connect the required PCIe power cables.
Step 9: Cable Management
Tidy up your cables using zip ties.
Keep airflow paths clear to maintain optimal cooling.
Step 10: Power On and Test
Before closing the case, connect the monitor, keyboard, and mouse.
Power on — if everything lights up, you’ve succeeded!
Install Windows, drivers, and essential software.
5. Install Windows and Drivers
Once your PC boots successfully:
- Install Windows 10 or 11 using a USB drive.
- Download and install motherboard chipset drivers.
- Install GPU drivers from NVIDIA or AMD’s official website.
- Update BIOS if needed for performance improvements.
After setup, install your favorite games and monitor system temperatures using tools like MSI Afterburner.
6. Optimize Performance
A few tweaks can make a big difference:
- Enable XMP/DOCP in BIOS for full RAM speed.
- Keep drivers up to date.
- Use software like HWMonitor to check temperatures.
- Adjust fan curves for quieter operation.
Regular maintenance, such as cleaning dust filters and updating software, ensures long-term stability.
7. Troubleshooting Common Issues
- No display: Check GPU and monitor connections.
- PC won’t power on: Recheck PSU cables and front panel connectors.
- Overheating: Ensure fans are running and thermal paste is properly applied.
- Crashes or freezes: Update BIOS, GPU drivers, or check RAM seating.
Patience and careful troubleshooting often solve 90% of first-time build issues.
8. Enjoy Your Build
Once your system is up and running, take pride in your creation!
Benchmark it using tools like 3DMark or Cinebench, then dive into your favorite games and enjoy smooth, responsive gameplay on your custom-built rig.
9. Professional Help When You Need It
Building a gaming PC is fun, but not everyone has the time or confidence to assemble one perfectly. If you’d rather skip the risk and get a professionally built, fully optimized gaming PC, Qbit can help.
Qbit offers custom PC building in Pakistan, where experts handpick components based on your budget, performance goals, and aesthetic preferences. Every build is tested, cable-managed, and delivered ready to plug and play — with warranty-backed parts and guaranteed compatibility.
So, whether you want to build it yourself or let experts handle it, Qbit ensures you get the best gaming performance, reliability, and value in Pakistan.
FAQs
1. What do I need to build my first gaming PC?
You’ll need a CPU, GPU, motherboard, RAM, SSD or HDD, power supply, PC case, and cooling system. Make sure all components are compatible and fit your gaming performance goals.
2. Is it cheaper to build a gaming PC than buy one?
Yes, building a PC can be cheaper since you avoid prebuilt markups and can choose parts that fit your exact needs. However, if you value convenience and testing, a prebuilt system from Qbit is a great choice.
3. How long does it take to build a gaming PC?
For beginners, the process typically takes 2 to 4 hours. This includes assembling components, installing Windows, and updating drivers.
4. What mistakes should beginners avoid when building a PC?
Common mistakes include forgetting motherboard standoffs, applying too much thermal paste, mixing incompatible parts, or poor cable management. Take time to plan each step carefully.
5. Can Qbit help me build my first gaming PC?
Absolutely. Qbit offers professional custom PC building services in Pakistan, ensuring perfect compatibility, clean assembly, and optimized performance — ready to game right out of the box.